How to Grow Microgreens on a Windowsill
Grow trays of tasty microgreens on a bright windowsill all year round. Best seeds, trays, sowing, watering, harvesting and fixing common problems.
Quick answer
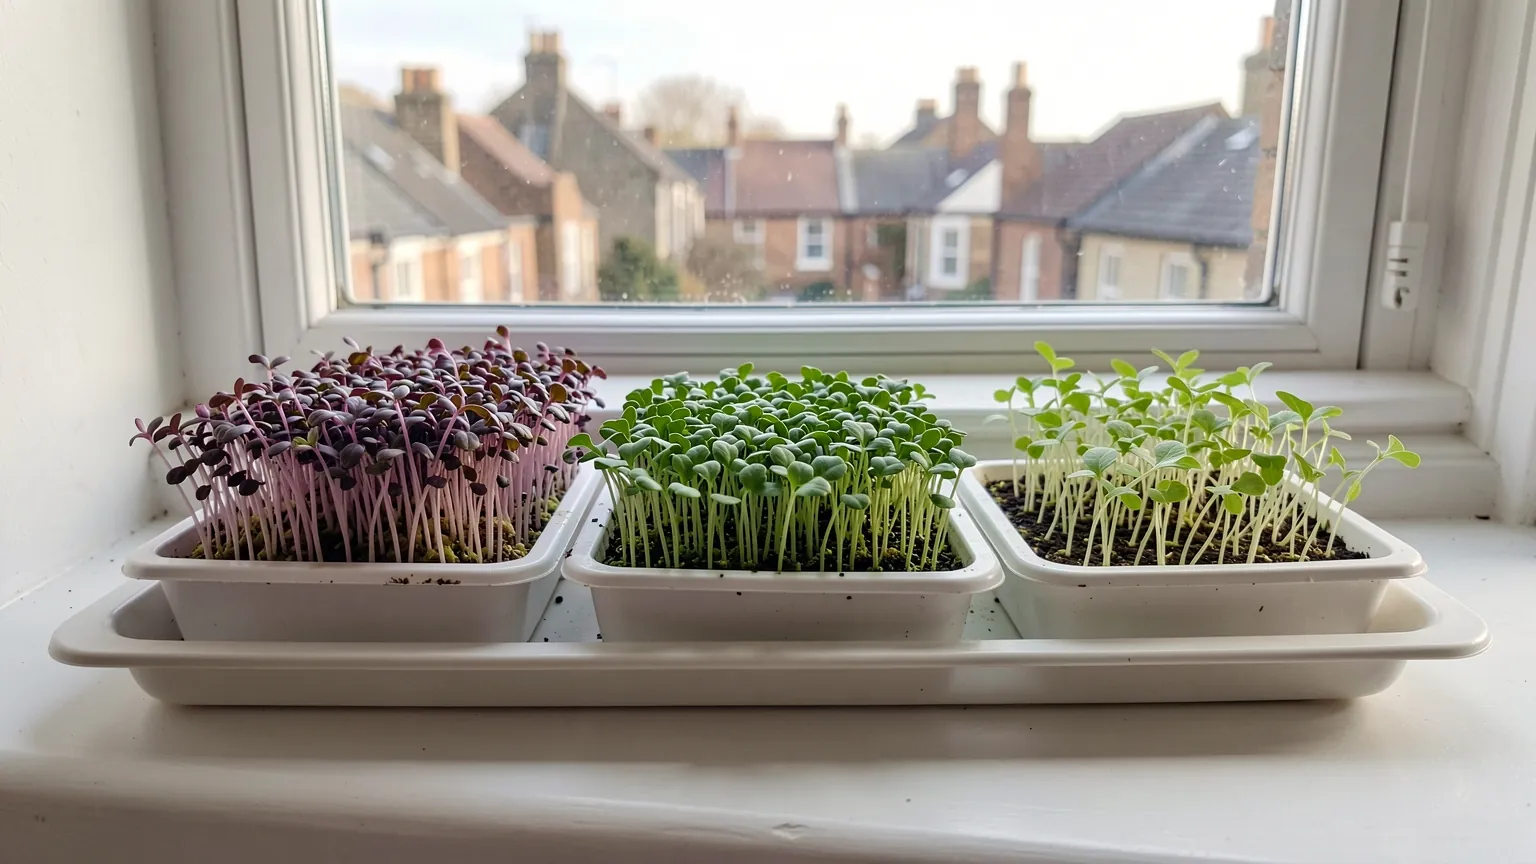
Microgreens are young seedlings of salad, vegetable and herb plants, cut when they are a few centimetres tall. To grow them on a windowsill, sow seeds thickly on the surface of a shallow tray of moist compost, keep them covered and dark until they germinate, then move the tray to your brightest window. Water gently from below and cut the seedlings with scissors just above the compost, usually one to three weeks after sowing.
Growing note: Microgreens are one of the few crops that grow well indoors in winter. They are harvested so young that they need far less light and time than full-sized plants, which makes them ideal for a flat with no outdoor space.
Quick facts
| Best for | Kitchen windowsills, flats and homes without outdoor space |
| Difficulty | Very beginner-friendly |
| Container | A shallow tray about 3–5cm deep, with drainage holes |
| Light | Your brightest windowsill |
| When to sow | All year round indoors |
| Best harvest | Usually 1–3 weeks after sowing, depending on the seed and the season |
What are microgreens?
Microgreens are the seedlings of edible plants, grown in compost and light, and cut once they have their first leaves. You eat the young stems and leaves, not the seed or roots. They have a concentrated version of the flavour of the grown-up plant, so radish microgreens are peppery, mustard is hot and pea shoots taste of fresh peas.
They are not the same as sprouts. Sprouts, such as bean sprouts, are germinated in water, usually in a jar, and eaten whole a few days later. Microgreens grow a little longer, in compost and daylight, and are cut above the compost.
Why microgreens suit a tiny garden
Microgreens need only a windowsill and a tray. There is no digging, no feeding and very little that can go wrong, and the first harvest comes quickly. That makes them a good first crop for anyone who has never grown food before, and a useful way to keep something fresh growing through autumn and winter.
Be realistic about quantity. A standard seed tray gives a few generous handfuls, enough to top salads, sandwiches, soups and eggs for a few days. For a steady supply, sow a small tray every week or so rather than one big batch.
Best seeds for microgreens
Buy seed sold for microgreens or sprouting where you can. It is cheaper in larger packets and it has not been treated with fungicide, which some garden seed is. Check the packet if you are using ordinary garden seed, and do not use any that is described as treated or dressed.
| Seed | What to expect |
| Radish | Very fast and reliable, with a peppery bite. Often ready in about a week. Some varieties have attractive purple stems. |
| Mustard and cress | Classic, fast and easy. Hot, spicy flavour. |
| Rocket | Small, quick seedlings with a mild version of rocket's peppery taste. |
| Broccoli, kale and other brassicas | Mild, fresh cabbage flavour. Easy and dependable. |
| Peas | Grown a little taller as pea shoots, with a sweet pea flavour. See our pea shoots guide. |
| Coriander and beetroot | Rewarding, but slower and less even to germinate. Better once you have grown a few easy trays. |
Only grow microgreens from plants whose leaves are eaten. Do not use seed of tomatoes, peppers, chillies, aubergines or potatoes, because their leaves are not edible. Never use sweet pea seed for pea shoots: sweet peas are an ornamental flower and are poisonous.
What you need
- A shallow tray. A seed tray, a mushroom punnet or a clean food tray with a few holes punched in the base all work. About 3–5cm deep is enough.
- A drip tray. Stand the growing tray in a second tray without holes to protect the windowsill and to water from below.
- Compost. Peat-free seed compost or fine multi-purpose compost. Sieve out any large lumps.
- A cover. An upturned tray, a lid or a sheet of card to keep seeds dark and moist until they germinate.
- Sharp scissors for harvesting.
How to sow microgreens
- Fill the tray with compost to about 1cm below the rim. Level it and firm it gently with your hand or a flat piece of wood.
- Water the compost until it is evenly moist but not soggy, then let any excess drain away.
- Scatter the seed thickly and evenly over the surface. Seeds can be close together, almost touching, but should not sit on top of each other.
- Press the seeds lightly into the compost so they make good contact. Larger seeds can be covered with a very thin layer of compost; small seeds can be left uncovered.
- Mist the surface with water and cover the tray to keep it dark and humid.
- Check daily. Once most seeds have germinated, usually after a few days, remove the cover and move the tray to your brightest windowsill.
Follow the seed packet for the sowing rate if it gives one. Sowing too thinly gives a sparse tray; sowing too thickly can encourage mould.
Light and warmth
Once the seedlings are uncovered, give them as much light as you can. A south- or west-facing windowsill is ideal in autumn and winter. In weak light, seedlings stretch towards the window and become long, pale and floppy.
- Turn the tray every day so the seedlings grow straight rather than leaning towards the glass.
- Normal room temperature suits most microgreens. They will grow more slowly in a cool room.
- On frosty nights, move the tray off a windowsill behind closed curtains, where it can get very cold.
- Avoid placing the tray directly above a hot radiator, which dries the compost out quickly.
Watering
Keep the compost evenly moist but never waterlogged. The easiest way is to pour a little water into the drip tray and let the compost soak it up from below for a few minutes, then tip away any that is left. Watering from below keeps the leaves dry, which helps prevent mould.
Check the tray every day. Shallow trays dry out quickly on a sunny windowsill, and seedlings wilt fast if the compost dries out completely.
Harvesting microgreens
Most microgreens are ready when they are about 5–10cm tall and the seed leaves have fully opened. Some growers wait for the first true leaves to appear for a little more flavour. Taste a few as they grow and cut them when you like the flavour.
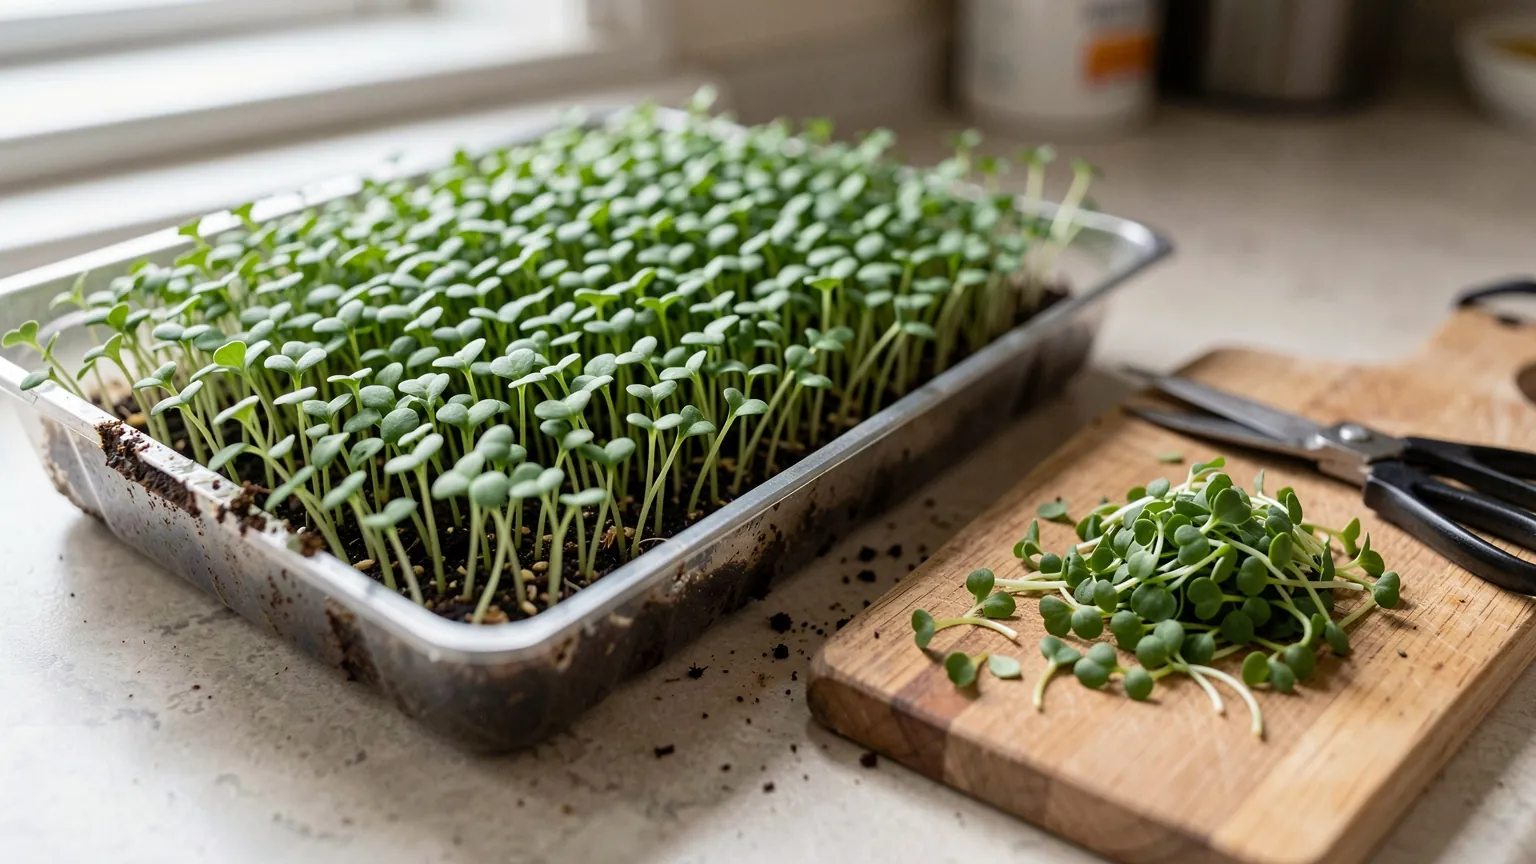
- Hold a small bunch of seedlings and cut just above the compost with sharp scissors.
- Cut only what you need. The rest will keep growing in the tray for a few more days.
- Rinse the cut microgreens gently and pat them dry before eating.
- Eat them fresh, or store them in a covered container lined with kitchen paper in the fridge and use them within a few days.
Most microgreens do not regrow after cutting. Once a tray is finished, add the old compost and roots to a compost heap or bin and start a fresh tray. Pea shoots are an exception and will often give a second cut.
Common problems
Tall, pale, floppy seedlings
This is a sign of too little light. Move the tray to a brighter window, turn it daily and remove the cover as soon as the seeds have germinated. In midwinter, quick crops like radish and mustard cope best with low light.
White fuzz on the roots
Radish and other brassica seedlings grow fine white root hairs that can look like mould. They are usually seen on the roots near the compost and disappear when you mist them. True mould is more web-like or grey, spreads across the compost and seedlings, and often smells musty.
Mould on the tray
Mould is usually caused by overwatering, sowing too thickly or poor airflow. Water from below, sow a little more thinly, and leave the tray uncovered once the seeds have germinated. Throw away any tray with mould on the leaves and stems, rather than eating it.
Seedlings collapsing
Seedlings that suddenly flop over at compost level may have damping off, a fungal problem encouraged by wet, cold compost and crowding. Use fresh compost and clean trays for every sowing, and avoid overwatering.
Patchy germination
Old seed, compost that dried out, or seeds that were not pressed into the compost can all cause gaps. Keep the tray covered and moist until the seeds germinate.
A simple microgreens plan
Start with one tray of radish or mustard microgreens on your brightest windowsill. Sow a fresh tray every week, so one is germinating while another is ready to cut. Once you have the hang of it, add a tray of pea shoots and a few pots of windowsill herbs.
Microgreens are one of the best windowsill crops in what to sow in October and what to sow in November. When spring comes, the same seeds can be grown on in pots as full-sized crops, such as radishes and salad leaves.
Find crops for your windowsill
Use the free growing tools to see which crops suit your windowsill, balcony or patio.
FAQs
How long do microgreens take to grow?
Fast crops like radish and mustard can be ready in about a week. Most microgreens take one to three weeks, and growth is slower in winter.
Do microgreens grow back after cutting?
Most do not. Cut what you need, then start a new tray. Pea shoots will often regrow for a second cut if you leave a leaf or two on each stem.
Can I grow microgreens without a grow light?
Yes. A bright windowsill is enough for most microgreens, especially quick crops like radish, mustard and cress. Seedlings may be a little leggier in midwinter.
Can I use normal seeds for microgreens?
Yes, as long as the plant's leaves are edible and the seed has not been treated with fungicide. Seed sold for microgreens or sprouting is usually cheaper for the quantity you need.
Can I grow microgreens without compost?
Some, like cress, can be grown on damp kitchen paper or a growing mat. Compost is more forgiving for beginners, because it holds moisture more evenly.
Growing note: The two secrets of good microgreens are light and little-and-often. Give the tray your brightest window and sow small batches every week.